Jak edytować dane pojedynczej pozycji na flatliście?
Do edytowania listy potrzebna jest nam… lista 🙂 Jeśli chcesz dowiedzieć się, jak stworzyć listę zadań, zobacz ten wpis: Renering list in React Native
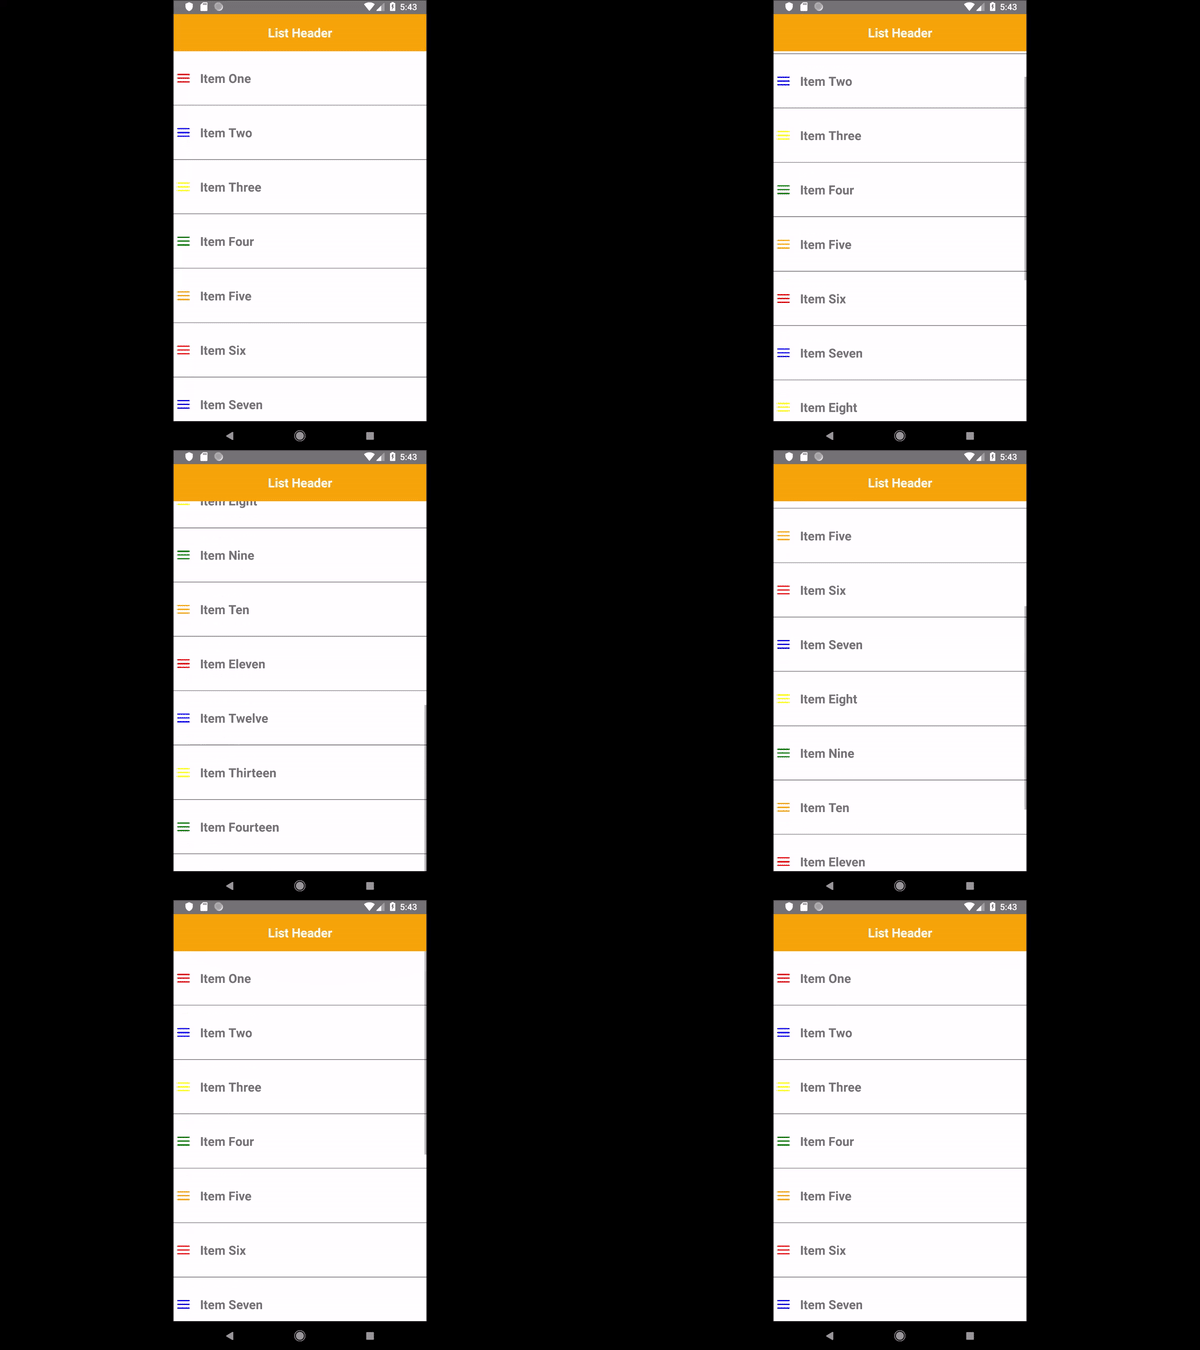
Nasza lista zadań z powyższego wpisu prezentuje się tak:

Dla przypomnienia, kod listy:
Data.js:
export default Data = [
    {id: 1, text: 'Item One', color: 'red'},
    {id: 2, text: 'Item Two', color: 'blue'},
    {id: 3, text: 'Item Three', color: 'yellow'},
    {id: 4, text: 'Item Four', color: 'green'},
    {id: 5, text: 'Item Five', color: 'orange'},
    {id: 6, text: 'Item Six', color: 'red'},
    {id: 7, text: 'Item Seven', color: 'blue'},
    {id: 8, text: 'Item Eight', color: 'yellow'},
    {id: 9, text: 'Item Nine', color: 'green'},
    {id: 10, text: 'Item Ten', color: 'orange'},
    {id: 11, text: 'Item Eleven', color: 'red'},
    {id: 12, text: 'Item Twelve', color: 'blue'},
    {id: 13, text: 'Item Thirteen', color: 'yellow'},
    {id: 14, text: 'Item Fourteen', color: 'green'},
    {id: 15, text: 'Item Fifteen', color: 'orange'},
]
List.js:
import React, {Component} from 'react';
import {StyleSheet, Text, View, FlatList } from 'react-native';
import Data from './Data';

export default class List extends Component {

    renderItem = ({item}) => (
        <View style={styles.item}>
            <View style={styles.marginLeft}>
                <View style={[styles.menu, { backgroundColor: item.color }]}></View>
                <View style={[styles.menu, { backgroundColor: item.color }]}></View>
                <View style={[styles.menu, { backgroundColor: item.color }]}></View>
            </View>
            <Text style={styles.text}> {item.text} </Text>
        </View>
    )

    render() {
        return (
            <View style={styles.contentContainer}>
                <View style={styles.header}>
                    <Text style={styles.headerText}> List Header </Text>
                </View>
                <FlatList
                    data={Data}
                    keyExtractor={(item) => item.id.toString()}
                    renderItem={this.renderItem}
                />
            </View>
        )
    }
};

const styles = StyleSheet.create({
    header: {
        height: 60,
        backgroundColor: 'orange',
        alignItems: 'center',
        justifyContent: 'center',
    },
    headerText: {
        fontSize: 20,
        fontWeight: 'bold',
        color: 'white',
    },
    contentContainer: {
        backgroundColor: 'white',
    },
    item: {
        flexDirection: 'row',
        borderBottomWidth: 1,
        borderBottomColor: 'grey',
        alignItems: 'center',
    },
    marginLeft: {
        marginLeft: 5,
    },
    menu: {
        width: 20,
        height: 2,
        backgroundColor: '#111',
        margin: 2,
        borderRadius: 3,
    },
    text: {
        marginVertical: 30,
        fontSize: 20,
        fontWeight: 'bold',
        marginLeft: 10
,    }
})
Jak edytować dane pojedynczej pozycji na liście?
Jeśli edytujemy dane na liście zadań, to zmiany te muszą zostać natychmiast na tej liście wyświetlone. W tym celu wykorzystamy stan komponentu, w którym zawarte będą dane wyświetlane we flatliscie i który będzie odświeżał nasz komponent za każdym razem, kiedy dane ulegną zmianie. Dlatego właśnie dane z pliku Data.js przeniesiemy do stanu komponentu List.js i stamtąd nasza lista będzie je odczytywać.
List.js:
export default class List extends Component {
    constructor(props) {
        super(props);
        this.initData = Data
        this.state = {
            data: this.initData,
        };
    }
...

render() {
...
                <FlatList
                    data={this.state.data}
                    ...
                />
...
}
Chcielibyśmy, aby po kliknięciu na konkretne zadanie pojawiło się nowe okno, w którym będziemy mogli dokonać edycji treści. Dlatego do każdego elementu listy dodamy klikalny element, który spowoduje otwarcie takiego okna (przyda się nam tutaj komponent Modal – zobacz wpis: React Native modal example).
W komponencie Modal dodamy komponent TextInput, w którym wyświetlimy treść klikniętego zadania, którą będzie można zmienić. Po naciśnięciu przycisku Save nowa treść zostanie zapisana do stanu, który odświeży widok listy.
W tym celu musimy dokonać kilku zmian w naszym kodzie:
List.js:
import React, {Component} from 'react';
import {StyleSheet, Text, View, FlatList,  TextInput, Modal, TouchableHighlight  } from 'react-native';
import Data from './Data';

export default class List extends Component {
    constructor(props) {
        super(props);
        this.initData = Data
        this.state = {
            data: this.initData,
      isModalVisible: false,
            inputText: '',
            editedItem: 0,
        };
    }

    setModalVisible = (bool) => {
        this.setState({ isModalVisible: bool })
    }

    setInputText = (text) => {
        this.setState({ inputText: text })
    }

    setEditedItem = (id) => {
        this.setState({ editedItem: id })
    }

    handleEditItem = (editedItem) => {
        const newData = this.state.data.map( item => {
            if (item.id === editedItem ) {
                item.text = this.state.inputText
                return item
            }
            return item
        })
        this.setState({ data: newData })
    }

    renderItem = ({item}) => (
        <TouchableHighlight onPress={() => {this.setModalVisible(true); this.setInputText(item.text), this.setEditedItem(item.id)}}
            underlayColor={'#f1f1f1'}>
            <View style={styles.item} >
                <View style={styles.marginLeft}>
                    <View style={[styles.menu, { backgroundColor: item.color }]}></View>
                    <View style={[styles.menu, { backgroundColor: item.color }]}></View>
                    <View style={[styles.menu, { backgroundColor: item.color }]}></View>
                </View>
                <Text style={styles.text}> {item.text} </Text>
            </View>
        </TouchableHighlight>
    )

    render() {
        return (
            <View style={styles.contentContainer}>
                <View style={styles.header}>
                    <Text style={styles.headerText}> List Header </Text>
                </View>
                <FlatList
                    data={this.state.data}
                    keyExtractor={(item) => item.id.toString()}
                    renderItem={this.renderItem}
                />
                <Modal animationType="fade" visible={this.state.isModalVisible}
                    onRequestClose={() => this.setModalVisible(false)}>
                    <View style={styles.modalView}>
                        <Text style={styles.text}>Change text:</Text>
                        <TextInput
                            style={styles.textInput}
                            onChangeText={(text) => {this.setState({inputText: text}); console.log('state ', this.state.inputText)}}
                            defaultValue={this.state.inputText}
                            editable = {true}
                            multiline = {false}
                            maxLength = {200}
                        />
                        <TouchableHighlight onPress={() => {this.handleEditItem(this.state.editedItem); this.setModalVisible(false)}}
                            style={[styles.touchableHighlight, {backgroundColor: 'orange'}]} underlayColor={'#f1f1f1'}>
                            <Text style={styles.text}>Save</Text>
                        </TouchableHighlight>
                    </View>
                </Modal>
            </View>
        )
    }
};

const styles = StyleSheet.create({
    header: {
        height: 60,
        backgroundColor: 'orange',
        alignItems: 'center',
        justifyContent: 'center',
    },
    headerText: {
        fontSize: 20,
        fontWeight: 'bold',
        color: 'white',
    },
    contentContainer: {
        backgroundColor: 'white',
    },
    item: {
        flexDirection: 'row',
        borderBottomWidth: 1,
        borderBottomColor: 'grey',
        alignItems: 'center',
    },
    marginLeft: {
        marginLeft: 5,
    },
    menu: {
        width: 20,
        height: 2,
        backgroundColor: '#111',
        margin: 2,
        borderRadius: 3,
    },
    text: {
        marginVertical: 30,
        fontSize: 20,
        fontWeight: 'bold',
        marginLeft: 10,
    },

    textInput: {
        width: '90%',
        marginLeft: 10,
        marginRight: 10,
        marginBottom: 30,
        borderColor: 'gray',
        borderBottomWidth: 2,
        fontSize: 16,
    },
    modalView: {
        flex: 1,
        backgroundColor: 'white',
        alignItems: 'center',
        justifyContent: 'center',
    },
    touchableHighlight: {
        backgroundColor: 'white',
        marginVertical: 10,
        alignSelf: 'stretch',
        alignItems: 'center',
    }
})
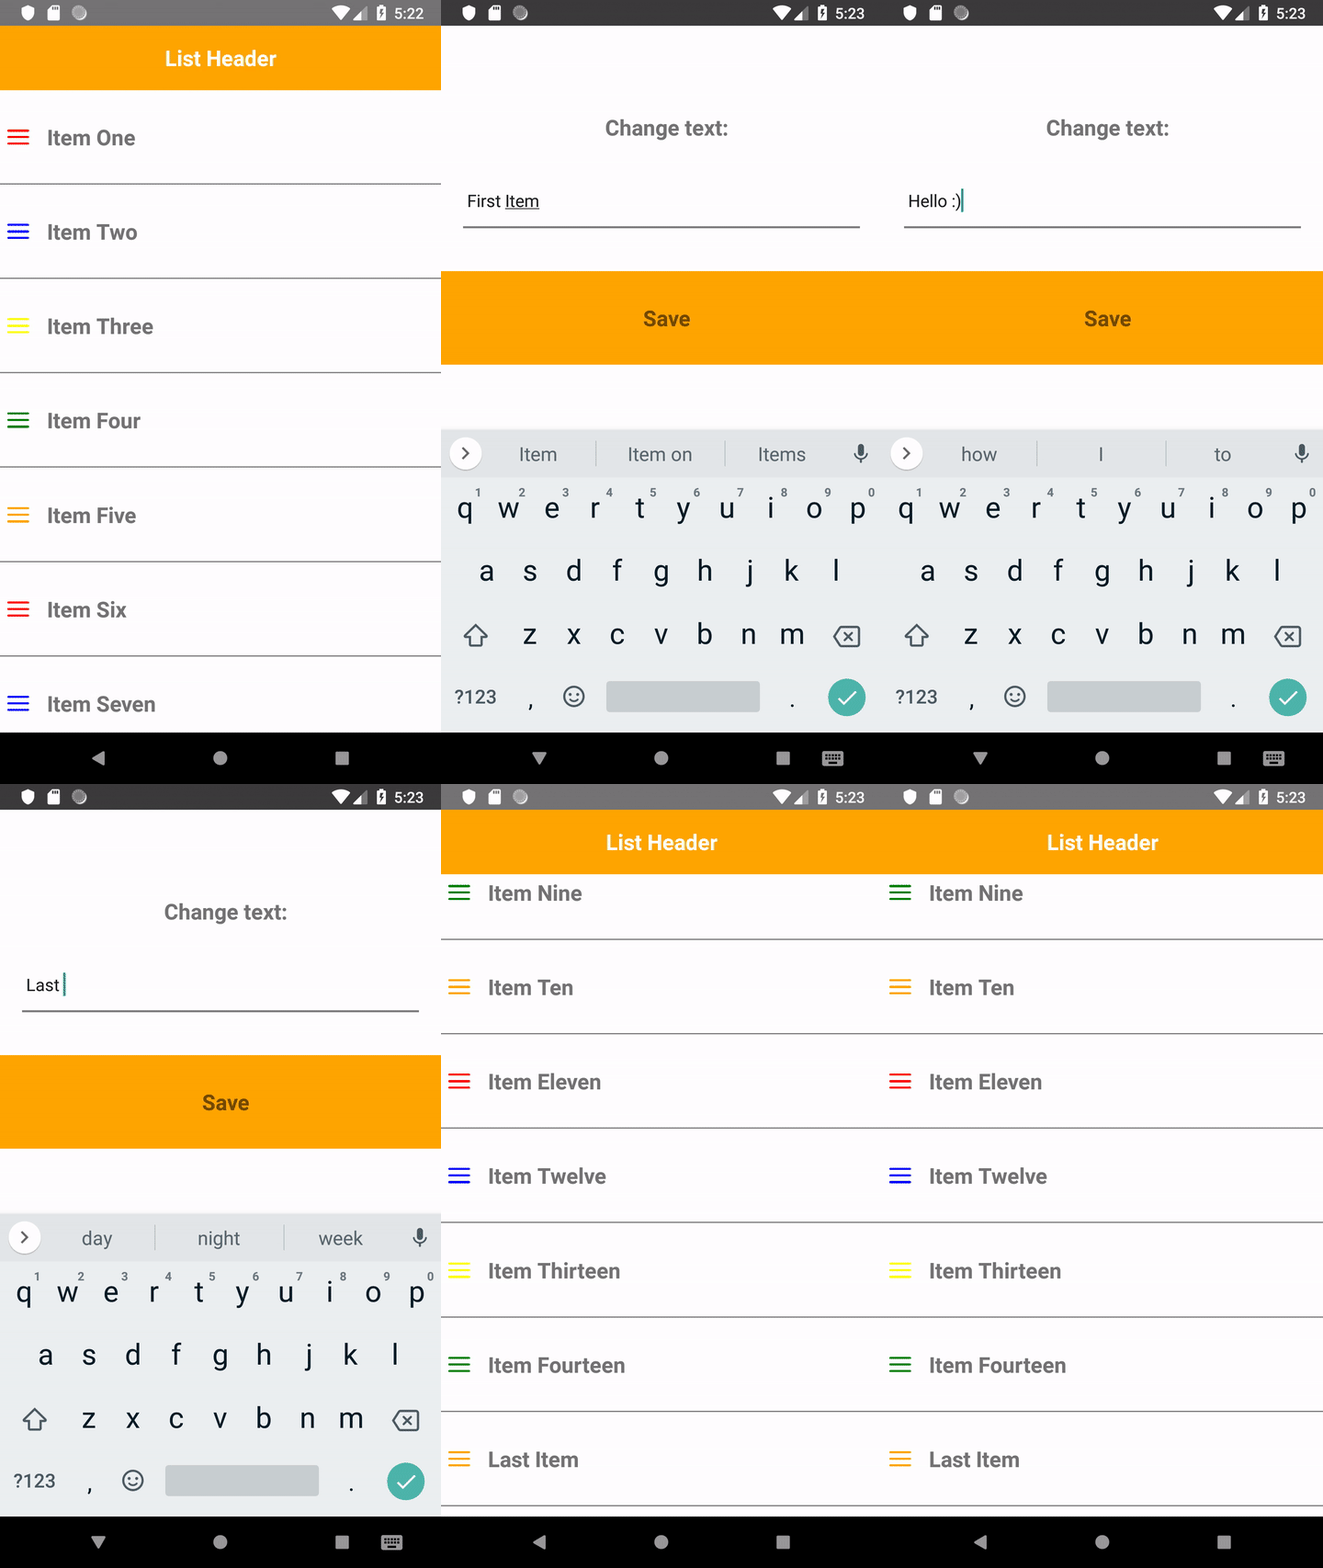
Teraz lista stała się edytowalna, możemy zmienić treść każdego zadania:

No dobrze, ale dane zapisane do stanu znikają w momencie
odmontowania komponentu lub zamknięcia aplikacji, co więc możemy zrobić, aby aplikacja zapamiętała dane na stałe? Tego dowiesz się z kolejnego wpisu: Zapisywanie i odczytywanie danych z AsyncStorage